Have a Question?
Step 2: Create Approval Process
Step 2: Create Approval Process
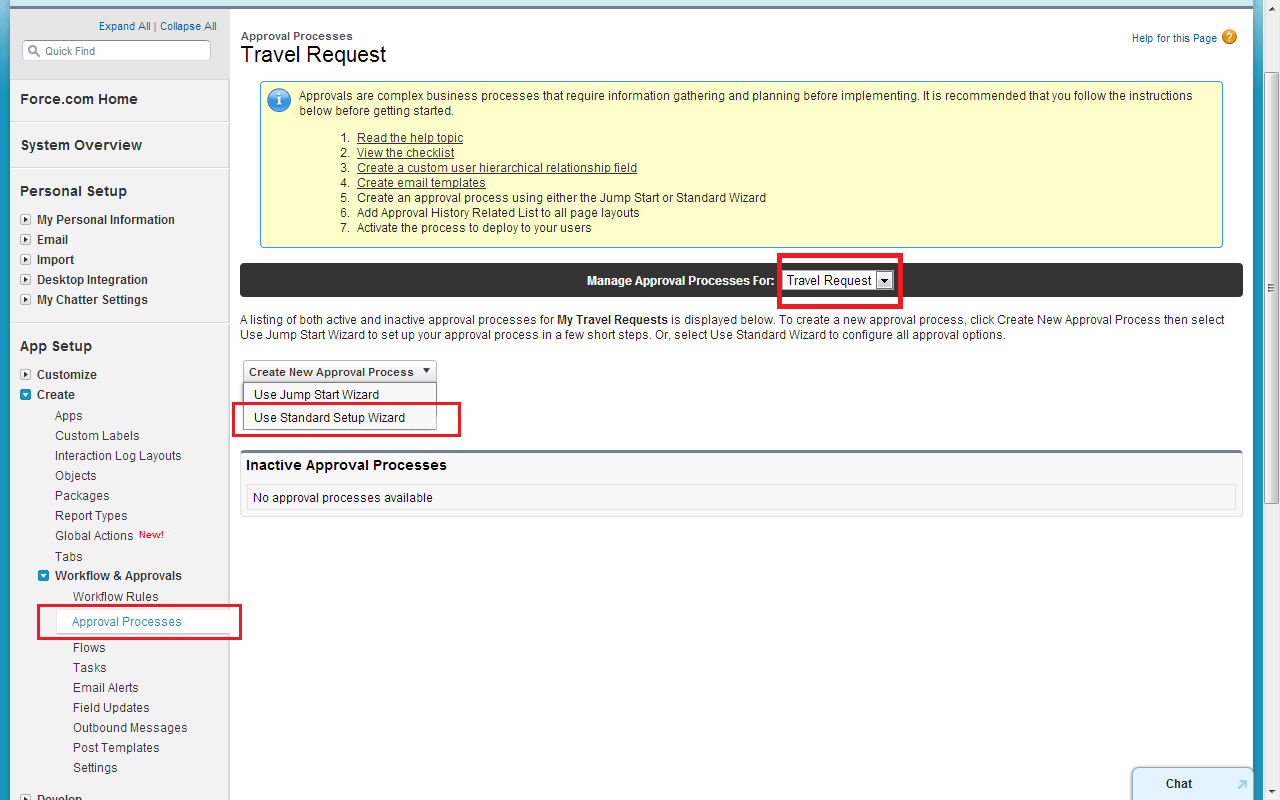
- Navigate to the App Setup section in the Setup Menu > App Setup > Create > Work Flow Approval Process > Approval Process
- Make sure that “select Travel Request object” and create a new Approval process use Standard Setup Wizard
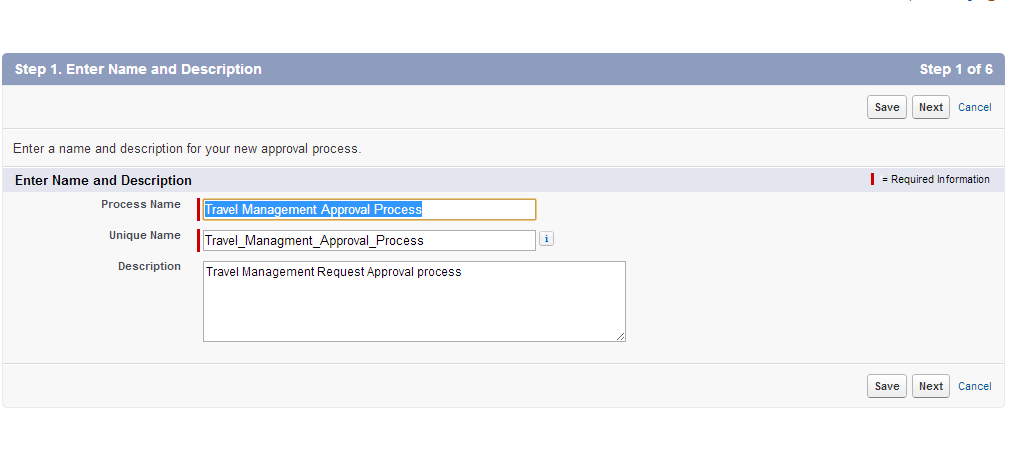
- Give process name and description and click on next
- Criteria are Met Where Status is not Equals to Approved and Approver not equal null
- Click next

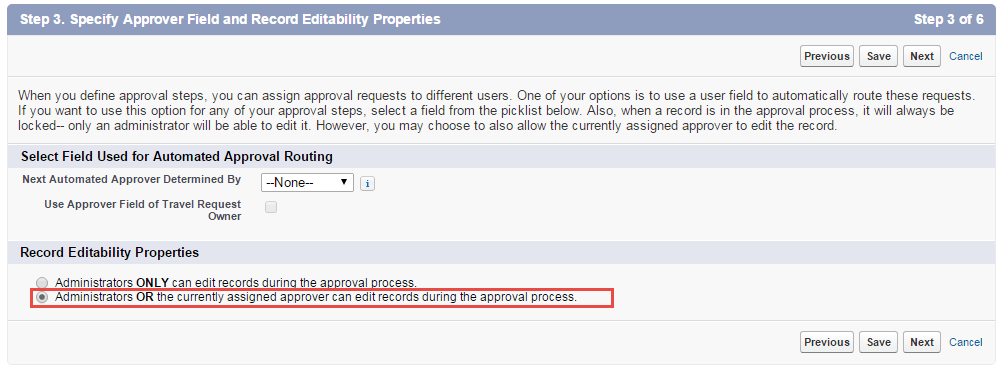
- Next Automated Approver to determine by None
- Check Administrators OR the currently assigned approver can edit records during the approval process.
- Click next
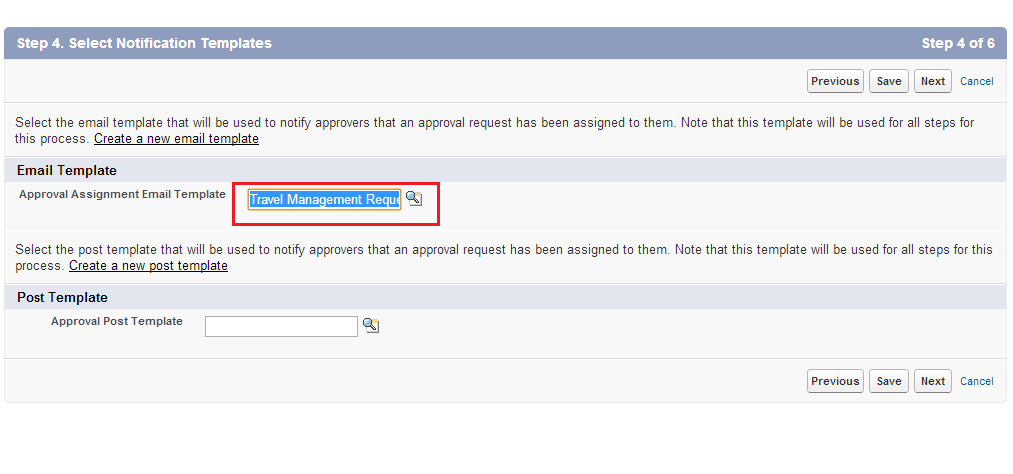
- Approval Assignment Template Select Travel Management Request
- Click next
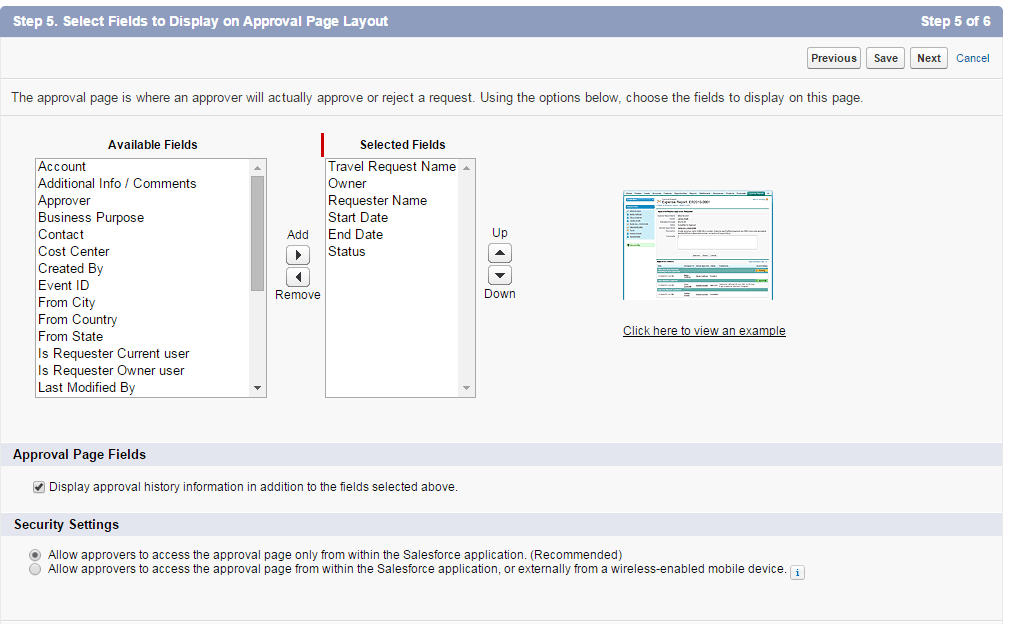
- Select The Fields which are shows select in the screen shot below
- Checked Display approval history
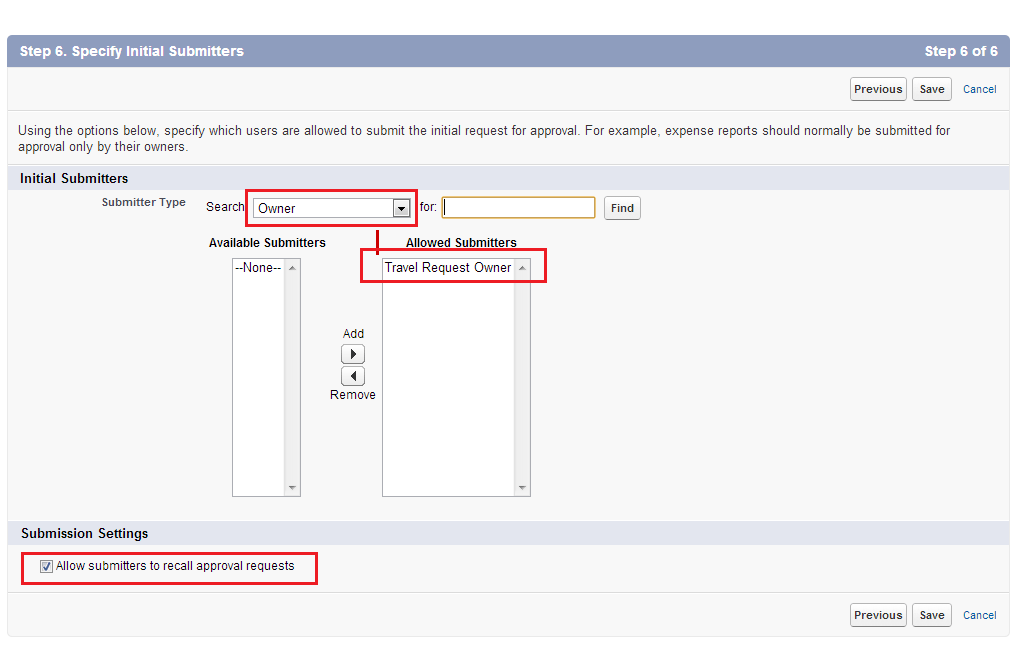
- Submitter type Owner and Allowed Submitters Travel Request owner and checked Allow submitter to Recall, and Save.